

Let me just say it straight away: great product photography isn’t easy to achieve.
But I’m not saying this to scare you. Rather, I’m saying this to comfort you.
The thing is, if you’ve been struggling to take good product images and haven’t been happy with your results, it’s not necessarily because you’re a bad photographer, it’s just that it’s not the easiest thing to master.
That being said, there are a number of things you can do to improve your product photography (and before you start worrying you’ll need to invest in new camera equipment, rest assured that these tips don’t require that).
But a good product photography lighting setup or a good photo light box will do wonders for helping you take amazing photos!
This post will be divided up into 4 sections
- Product Photography Lighting Tips For Beginners – Everything you need to know to take high quality images for your store
- Putting The Principles To Practice – How I take product photos for my store and the most important piece of photography equipment I own. (Hint: It’s Not A New Camera)
- How To Select The Best Product Photos That Will Actually Generate Sales – A tried and true method for selecting high converting photos for both Amazon and your ecommerce store
- Common Mistakes That New Shopowners Make With Their Photos – Newbie mistakes that I see a lot of new ecommerce store owners make with their product photography.
You ready? Let’s get started.
Get My Free Mini Course On How To Start A Successful Ecommerce Store
Are you interested in creating a strong, defensible brand for your products? If so, I put together a comprehensive package of resources that will help you launch your own online store from complete scratch. Be sure to grab it before you leave!
Table of Contents
Tip #1: Setup Your Product Photography Lighting

Photography is nothing without light, so you’ll want to make sure you do a great job of lighting your products.
If you’re new to photography, I think it’s best to start off using natural light (aka the sun). Natural light is soft, always available (barring any major earthly catastrophe, of course), predictable and easy to work with.
Pick your biggest north-facing window, put a table next to it and play around with how the light hits your product.
You can, of course, also use flashes and constant lighting (like lamps or actual photo lights). This way is trickier (you’ll want to avoid harsh, ugly shadows from direct flashes) and more costly (you’ll need additional equipment) but some prefer the added control.
Note: Since I do most of my work after the kids have gone to bed, I usually take my photos at night which requires a lighting system. I’ll go over what I’m currently using in the next section
Tip #2: Stage Your Product
It can be really helpful to buyers when you stage your product by including other objects.
If you take a look at my store, you’ll notice that my images often include flowers or dishes for the linen napkins that I sell.
Staging can give your buyer more context in how your item is used. It can also help show the scale of your product.
For example, if you’re selling something that people wear, it’s a great idea to take a picture of a model wearing it (either a mannequin or a real person). Since people usually aren’t good at imagining what it looks like on, you’ll be giving them a clearer idea of what to expect.
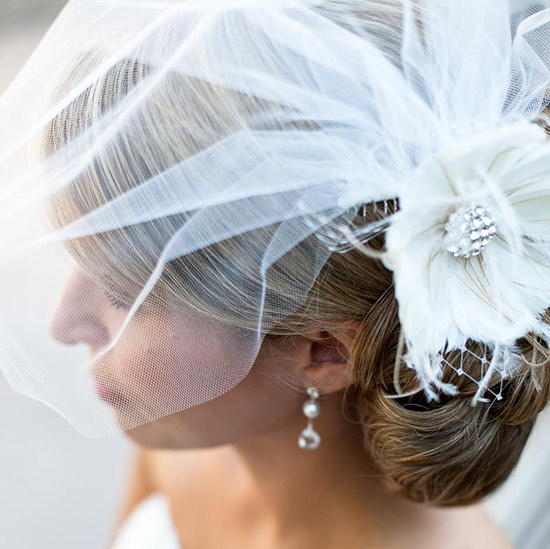
If you do decide to include other objects just be sure they don’t distract the viewer too much from the product itself.
Note: For your main sales image, Amazon requires that your product fill up the majority of the frame and props are not permitted. However, external objects and staging props are fair game for the extra photo slots on your listing.
In fact, it is highly recommended that you include lifestyle images of your product being used. Make sure you use EVERY photo slot possible!
Tip #3: Take Photos from a Lot of Different Angles
If you’re selling exclusively online, customers won’t be able to physically touch or handle your product so you’ll want to show them as much as possible about your item to help eliminate any questions or uncertainty.
Go crazy with your photos and take many different angles of your product ie. shoot from the side, top, bottom, etc.
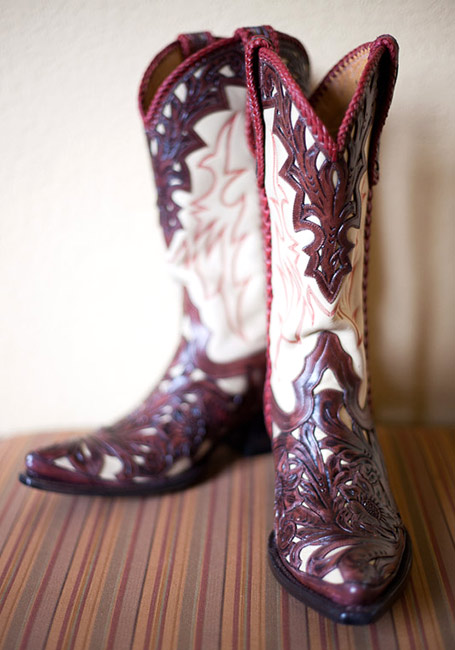
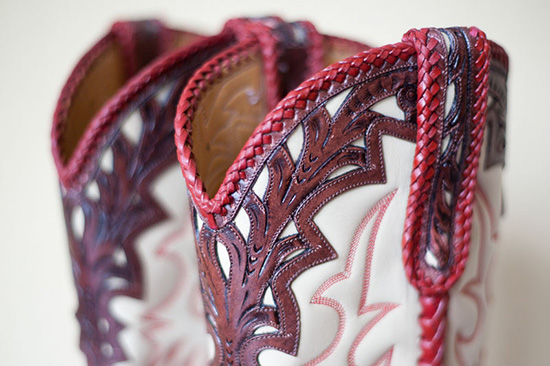
And don’t forget to include close-up shots. People love to see texture and the little details that make up your product. I know that when I buy online, a seller can almost never provide too many photos of a product, and photos are the first things I look at before buying anything online.
Tip #4: Be Careful with Your Background
What background should you use? Well, it depends.
Some people prefer an all-white background. It’s clean, simple and straightforward.
Note: Amazon requires that your main sales image be on a completely white background.
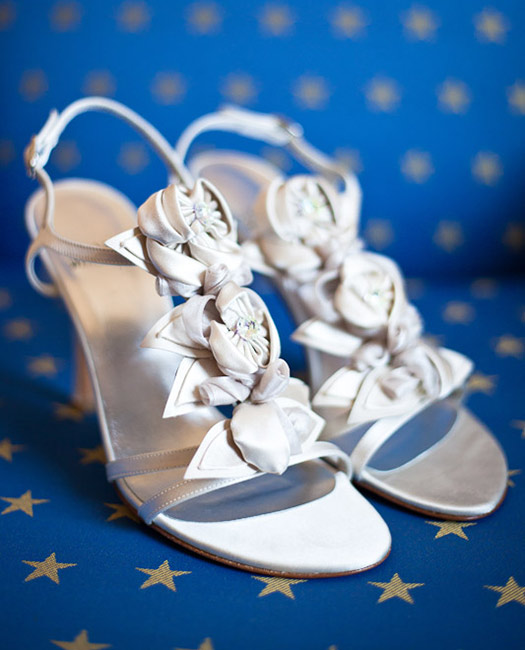
Others prefer to use backgrounds with patterns that complement the product.
Still others like to shoot ‘on location’, like outside in their backyards.
There are many different ways to achieve great shots and each has their own challenges and benefits, so it comes down more to personal preference and what works for your particular products.
Also remember to keep the background tidy and remove all distracting elements that may draw attention from your product (this will be especially important if you’re not using a backdrop).
Tip #5: Use a Tripod
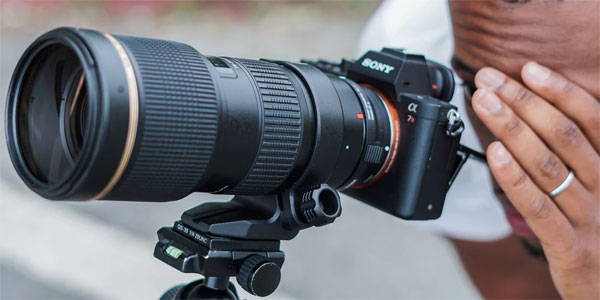
I don’t normally advocate the use of tripods, but with product photography they can definitely come in handy – especially if you’re shooting a lot of products all at once.
The benefits of a tripod are:
- They keep the camera steady (blurry shots = unusable shots)
- They keep the camera in the same exact position so your angle will stay the same for every image
- They free up your hands so that you can reposition your products to take different angles
Tip #6: Make Sure Your Images are Sharp
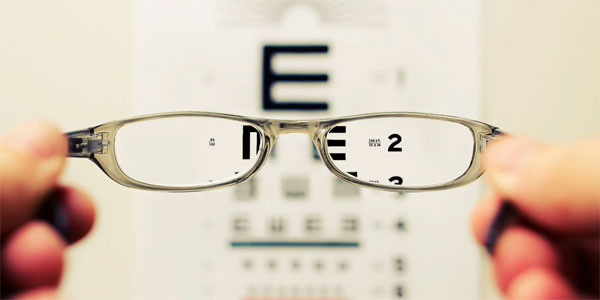
One thing a lot of professional photographers are sticklers about is the sharpness of their images. There’s almost nothing worse than a blurry or soft photograph. It’s unprofessional and doesn’t do your product justice.
What you want to aim for is what is referred to as ‘tack sharp’ images, where your main point of focus is undeniably sharp.
The best ways to ensure your product photos are tack sharp are to:
- Hold the camera steady – If you have trouble with this, then use a tripod or set your camera down on something stable.
- Control your focus point – If you have a DSLR, you likely have the ability to choose a particular focus point within your frame. Use this to select the focus point closest to the area you want most in focus.
- Make sure you you’re shooting with enough light – The darker it is, the harder it will be for you to get your camera to focus properly, so be sure you’re photographing with enough light.
- View your image at 100% – After you’ve taken an image, use your camera’s viewfinder to zoom in to 100% and scroll around your image. Is your product sharp or does it look a bit soft? Because you’re probably shooting digitally, you can take as many photos as you need to to make sure you get your shot.
Tip #7: Edit Your Images
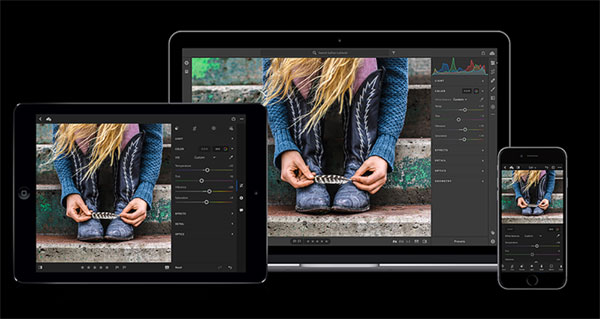
No matter how good of a photographer you are, most of your images can use a little cleaning up.
After you’ve taken your photos, open up your photo-editing program of choice (I use Lightroom and occasionally Photoshop, but even included or free programs like Windows Live Photo Gallery or Instasize on mobile will do fine) and do a little adjusting.
Here are some tweaks you may want to perform:
- Cropping – While it’s usually good to frame and compose your subject correctly when you’re taking your photo, it’s not always possible to get it just right. Now’s the time to crop tighter or straighten out your images.
- Exposure – If your photo is a little under-exposed (too dark) or over-exposed (too light), then use the exposure slider to adjust appropriately. Don’t go too crazy with it, though, usually a light touch will give the best results.
- Retouch – If you notice a bit of dust or other unwanted blob in your image, try finding and using the tool that helps you remove that. You don’t need a fancy editor to do this, either. I’ve found that the Windows Live Photo Gallery editor does a really good job of this – I was pleasantly surprised.
Click Here To Buy Adobe Light Room
Tip #8: Be Consistent
There’s really no right or wrong way to take your photographs and the details of how you decide to take your photos is more of a personal one. But one really important tip I want you to keep in mind is to be consistent.
For example, whether you choose to photograph with an all-white background or not, make sure all of your images follow the same look. It’ll help give your shop a much more cohesive feel.
Spend a little time thinking about what you want to convey about not only your product but your brand. Your imagery will be a factor in how customers perceive your company so be sure your images reflect your message correctly.
Putting These Principles To Practice And Recommended Equipment
When my wife and I first started out, we took all of our photos in natural sunlight and they turned out pretty well.
But the problem was that we wanted all of our photos to use the same background and depending on the color temperature and intensity of the sun on that particular day, the background would look completely different.
If you look at the photo below, both handkerchiefs are taken on the exact same table but the color of the table looks totally different because they were taken during different times of the day.

Also because we both worked full time jobs, it was extremely difficult to get home from work and take photos before the sun went down.
The Problem With Using Individual Lights
Eventually, we decided to invest in some lighting equipment and stumbled upon this inexpensive lighting kit from Fancier Studios. I liked this lighting kit for a few reasons.
One, it was pretty inexpensive. And two, I could use it for creating videos as well.
Here’s a picture of our setup below.
(Note: We actually use 3 lights for our product photography but I couldn’t fit the 3rd light in the photo)
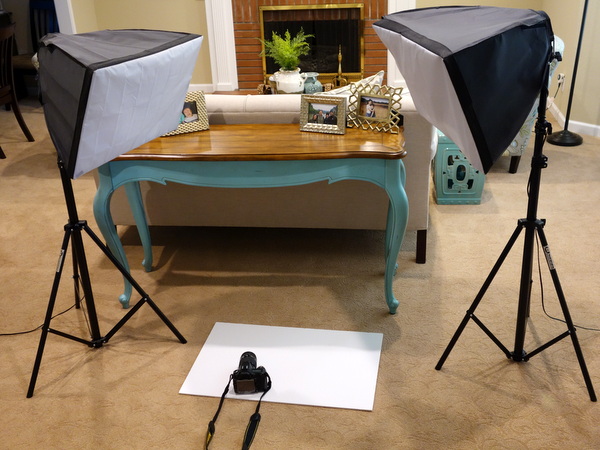
Now this setup has served us well for several years but there were many things that my wife and I didn’t like about it.
For one thing, we don’t have enough room in our house for a dedicated photography studio.
As a result every time we need to do a photo shoot, I have to go to the garage, lug around these big lights, move the furniture aside and set everything up. While the setup process only takes 15 minutes, it’s a major pain in the butt.
In fact, I find it so tedious that I dread doing product photography altogether and take all of our new product photos in large batches. As a result, sometimes it can take months for a new product to make it to our website just out of pure laziness.
The other major pain is that I have to wait until the sun goes down in order to take pictures with consistent lighting. After all, if I let the sunlight mix in with the fluorescent lighting, the results become unpredictable. (Note: Almost every room in our house has a window except the garage)
The Best Solution That I’ve Found So Far – A Photo Light Box
Lugging around our big lights didn’t really bother me that much until I discovered the magic of portable light boxes.
The light box pictured below is made by SimpQ and measures about about 16in X 16in X 3in. It’s literally the size of a large briefcase and it’s super light!
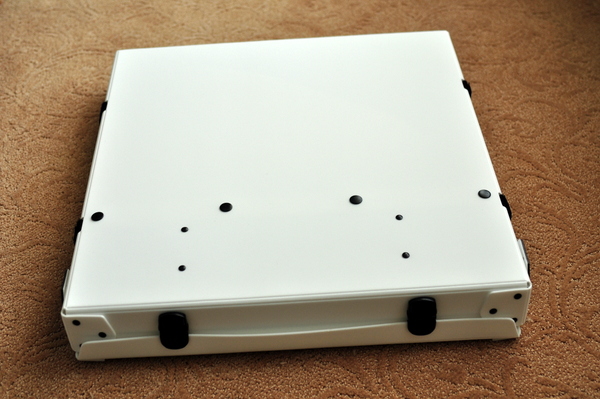
When opened, this little box expands to fully functional light box. Total set up time for me was about 5 minutes which is pretty fast considering that I wasted some time fumbling with the different panels and light diffusers.
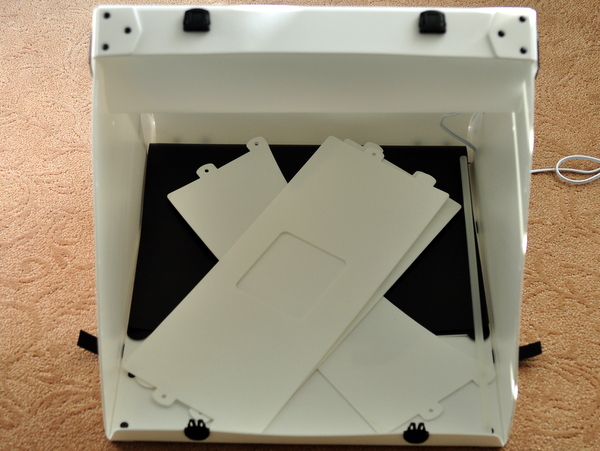
And what’s really cool is that you can fully enclose your product in the box and completely remove and minimize the shadows in your photos. This particular box comes with a few different panels to allow you to easily take your products from different angles.
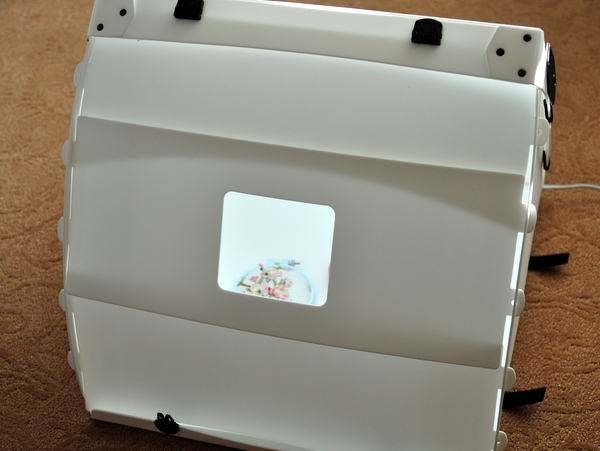
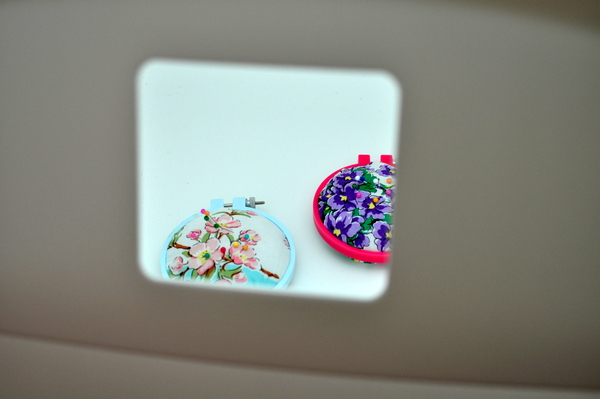
Once you have the box setup the way you want, there’s this little opening where you can stick your camera. And outside of this opening, the product is pretty much bathed in consistent light from a set of fluorescent bulbs within the unit.
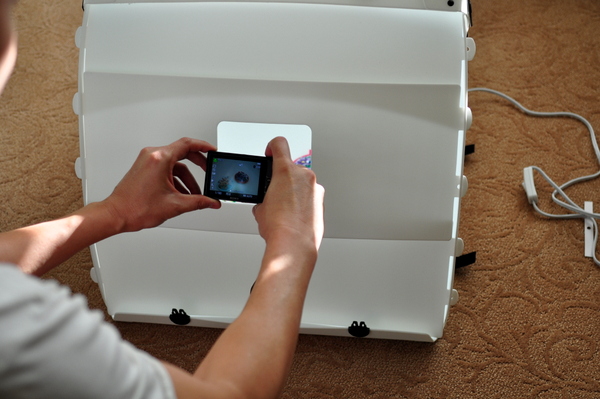
Here’s a picture of what it looks like from the camera’s perspective.
Before And After Shots
As soon as I got my hands on this light box, I immediately did some comparison photos with my existing 3 light setup.
The first photo below was taken in my living room using my 3 big fluorescent lights. As you can see, there are some light shadows underneath the red hoop and the light blue hoop looks a little dull.
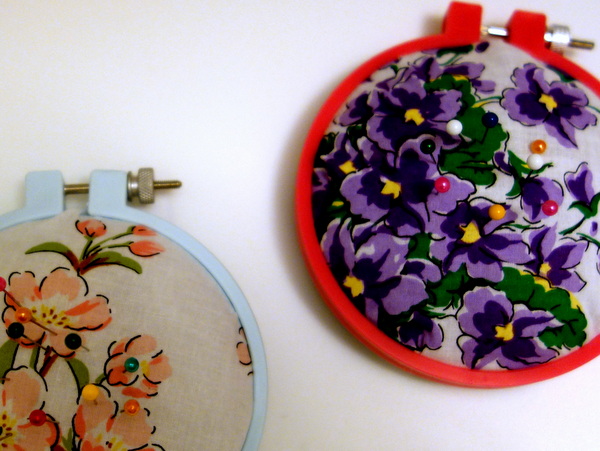
But with the portable light box, both hoops are evenly lit with very few shadows.
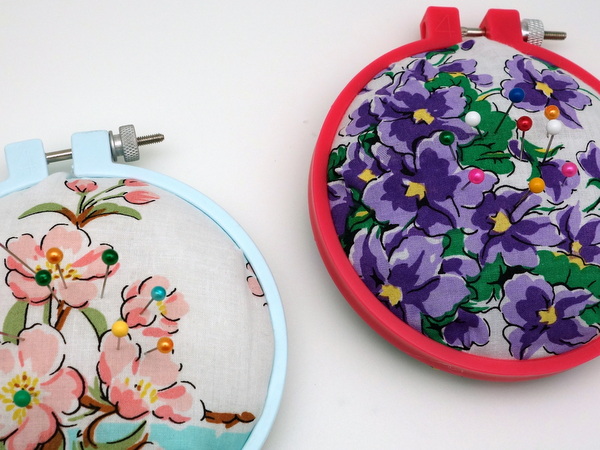
I know that I’m probably being a little too anal, but not having to worry about shadows is a major plus because I often have to adjust my lights in order to minimize reflections and dark spots in my photos.
But with the light box, every surface is consistently reflective which results in very even light with the same color temperature and intensity.
A Light Box Will Save You Time
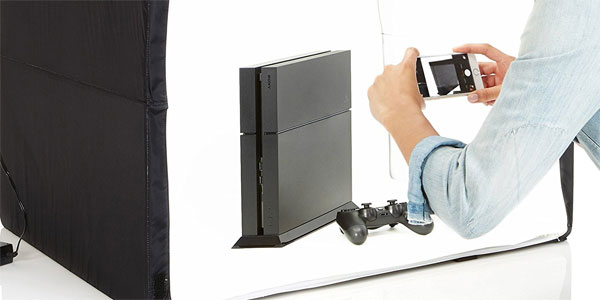
While the picture quality of my 3 light setup is perfectly fine and acceptable, it’s a major pain in the butt for me to setup. Not only does it require more space but setup also requires a bit of adjustment in order to remove reflections and shadows from my product images.
Ever since I started using this light box, I rarely bust out the big clunky lights any more unless I’m filming a video for my blog.
The product photos for your online store are way too important for you to not invest in some sort of lighting setup. It doesn’t have to be expensive and it doesn’t have to be fancy, but you need to get something.
The box that I used in this post is no longer sold on Amazon. But I took a quick look and Amazon is currently selling this portable light box for only $135 which is a steal.
It folds nicely into a small box the size of a stack of records and you can easily setup and break it down in a matter of minutes.
In fact, I may take this baby along to the next trade show and take product photos directly in my vendor’s booth.
Click Here To Check Out This LightBox From Amazon Basics
How To Choose The Highest Converting Photo For Your Product Listing
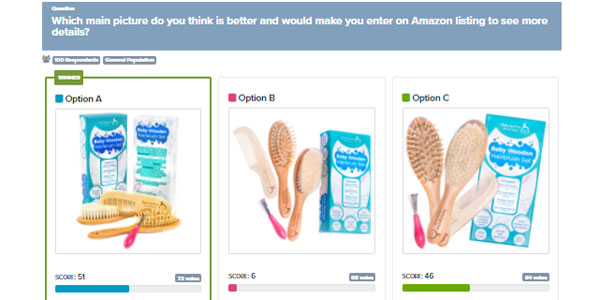
If you’ve followed all the steps up until this point, you now have a TON of high quality product photos at your disposal. And therein lies the problem…
Which images should you use for your product listing?
After all, just because an image is beautiful and crisp doesn’t necessarily mean that it will convert to sales. And there’s a lot more to good product photography than just taking a nice looking shot.
So how do you figure out which images will lead to more sales? There are 2 ways to do this
The first way is to split test your images. Simply use two different versions of your images for a period of weeks or months and see which one performs better in terms of sales.
The second more efficient way is to solicit live customer feedback BEFORE you create your product listing. Unlike split testing, this strategy yields useful results in minutes rather than months and is the method that I use for my shop.
How To Get Real Time Feedback For Your Images
There are many services out there that will allow you to get instant feedback from live humans for a small fee. But for the purposes of this example, I decided to use a service called PickFu.
For just 20 bucks, you can instantly get 50 people to provide feedback on your images in a matter of minutes!
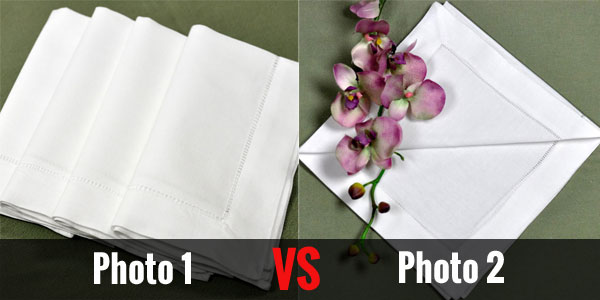
Here are the 2 photos that I decided to compare
How To Setup A Quick Poll
If you were to set up a split test on Amazon with your images, it could easily take weeks or months to come to a conclusion. But what’s nice about PickFu is that you’ll get an answer within 15-20 minutes. And you can easily target a similar demographic to your existing customer set.
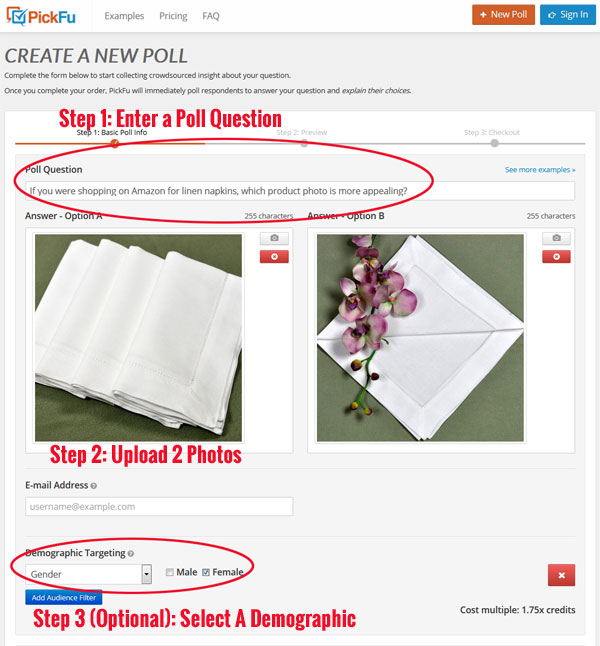
Here’s what you need to do to set up a test.
- Enter a poll question – Which images do you like better? Which photo makes the product more appealing to buy?
- Upload 2 or more images to test – You can upload multiple images if you want but it will dilute your results unless you choose more respondents
- Select your demographic – Choose people to take part in your poll that are as close to your customer avatar as possible
- Hit go
- Wait 15-20 minutes and review your results
And the best part is that it’s super cheap to run a test. This particular poll cost me $16.
Use coupon code: MYWIFEQUIT to get 50% off (Click here to run your first poll)
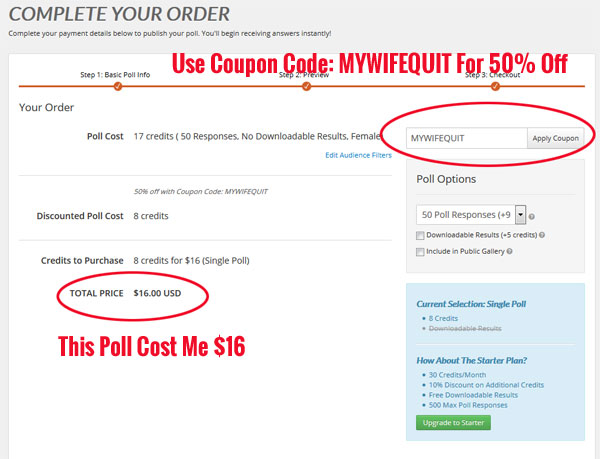
Note: Normally this poll would cost $10 with the coupon. But I chose to target only females for my poll. There are a number of ways to restrict your test within a certain demographic but it costs more.
The Results Of My Poll
This particular poll took exactly 20 minutes to run!
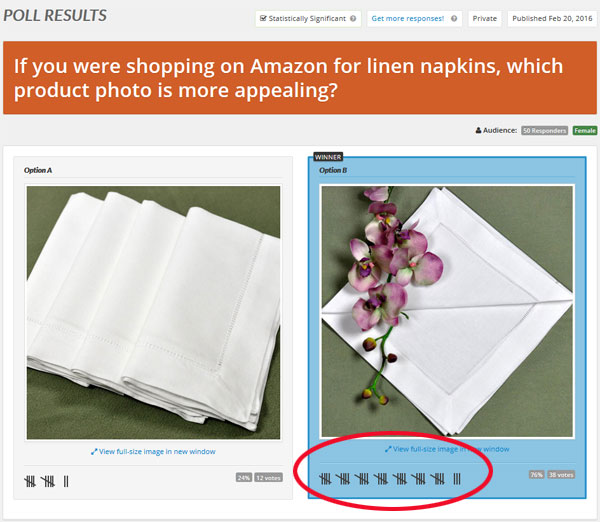
As you can see above, the second picture won quite handily.
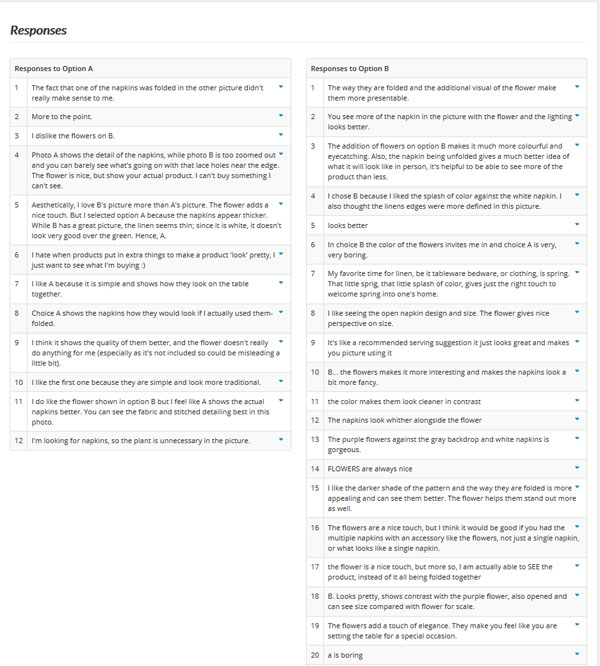
In addition, every person polled left detailed feedback as well. With this information, you can gain valuable insights on how to improve your product photos and learn what is most appealing to potential customers.
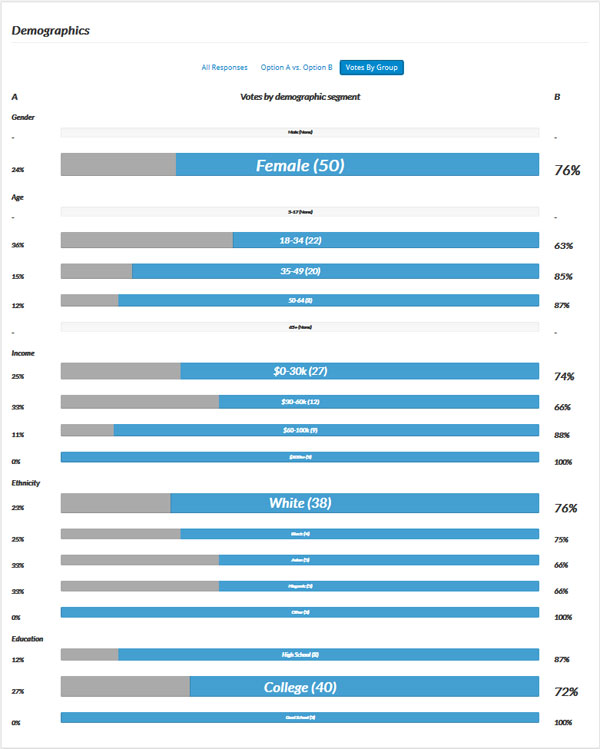
You will also receive in depth demographic information on who took part in your poll.
Click Here To Run Your First Poll And Use Coupon Code: MYWIFEQUIT to get 50% off
Common Mistakes New Shop Owners Make With Their Photos

If you used my process described above, you now have incredible product photos for your store. But many new shop owners make critical mistakes in how they display their products.
Mistake #1: Using Too High Resolution Photos

I’ve seen many online stores fall into this trap. They use an extremely high resolution photo for all of the product pictures on the site. As a result, the website loads extremely slowly and drives customers away.
I once went to a website and each photo was 3MB in size. The site took several minutes to load!
Unless you are actually selling photos on your online store, the resolution of your pictures don’t really need to be that high. A resolution of 72 pixels per inch is more than enough for the web.
You can also get away with turning the jpeg compression settings lower (higher compression) as well and not drastically affect the clarity of your photo. All of the photos in our shop use either a 50-60 JPEG quality in Adobe Photoshop.
Mistake #2: Don’t Load a Larger Picture Size Than You Need
Often times, you will be displaying the same photo on your website at many different sizes.
For example, the same product photo might be displayed at a large size for your main product photo, a medium size for your thumbnail photo and an extremely small size for your shopping cart display.
You should never use the same size photo(by size I mean kilobytes) for all of the large, medium and small pictures on your site!
To maximize the efficiency of your website, you should have separate versions of pictures for each and every permutation of a particular size photo.
Some shopping cart programs will create these smaller versions for you and cache them on your site for faster load times. If your cart has this feature use it!
Otherwise, make sure you generate all of the different sized photos yourself and use the appropriate photo depending on the application.
For example, you can use media queries to display different sized images on different devices. Below is a CSS example of two images that are selectively displayed depending on the screen size.
body {
background-image: url(‘smallimage.jpg’);
}
/* For width 400px and larger: */
@media only screen and (min-width: 400px) {
body {
background-image: url(‘largeimage.jpg’);
}
}
Note: Fully hosted carts like Shopify and BigCommerce do this by default.
Mistake #3: Don’t Forget to Use the “Alt”, “Width” and “Height” Tags For Your Photos

The use of the “Alt” tag is essential for the search engines to be able to index your photos properly. Otherwise, the search engine will have absolutely no idea how to categorize your product.
The “Width” and “Height” tags are important because they directly affect how your page gets loaded and displayed in the web browser. If you don’t explicitly provide an image size, your page will flicker and erratically get larger and smaller until all of your pictures load properly.
By specifying a “width” and a “height”, your web browser will provide a blank placeholder for your image until the full image has been loaded.
While you may not think this is a big deal, it makes a big difference in how professional your website will come across to a potential customer. First impressions are key!
Note: For responsive site designs, you should set the width as a percentage or use the “auto” property.
Mistake #4: Don’t Mix And Match Different Photo Sizes For Your Thumbnail Photos
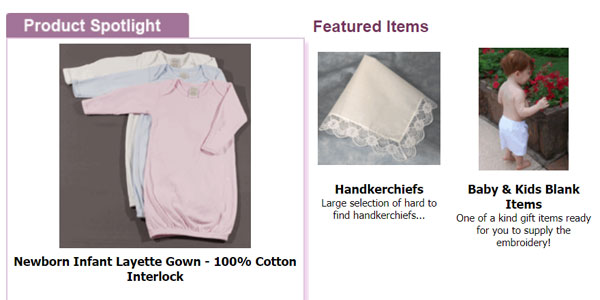
Let’s say you are displaying a wide array of your product thumbnails on the same page for the customer to look at. There’s nothing more annoying than for a customer to have to sort through different sized or rotated photos while browsing through the catalog.
It’s also equally annoying to have to scan through photos that are not aligned either horizontally or vertically.
Ideally, all of your thumbnail pics should be of the same width and height and be organized in an aesthetically pleasing grid pattern on your site. That way, your customer won’t get a headache as he/she scans through your products.
Conclusion
Creating high converting product photos is much more involved than just taking pretty pictures.
It all starts with understanding the basics of photography but that’s just par for the course. Once you start taking decent photos, you must figure out how to frame your products in the best possible light to appeal to your customer base.
And while it’s impossible to know exactly which photos will work best, tools like PickFu make the process infinitely easier and faster through trial and error.
Tools Mentioned In This Article
- Photo Light Box – The easiest way to take great product photos
- Adobe Lightroom – The industry standard for light photo touchups
- Pickfu – Save 50% off your first poll with coupon code: MYWIFEQUIT
This post was co-written by me and my friend Kim Olson. Check out her photography website when you get a chance!