This post will teach you how to create your own Amazon storefront step by step. You’ll also learn how to leverage your Amazon store to drive traffic and sales from external sources.
One of the main problems with selling on Amazon is that it’s really hard to establish a strong brand. Every product listing looks identical and your brand name is often displayed in a tiny font that is easily overlooked.
To improve your brand visibility, Amazon introduced “Amazon Stores” to allow you to set up a home base within Amazon to highlight your unique value proposition.
Are you interested in creating a strong, defensible brand for your products? If so, I put together a comprehensive package of resources that will help you launch your own online store from complete scratch. Be sure to grab it before you leave!
Table of Contents
What Is An Amazon Storefront?
An Amazon Storefront is a branded destination within Amazon’s platform where Amazon Sellers can showcase their top products, story, and content. It offers sellers customizable layouts and provides insights on traffic and sales.
Creating an Amazon storefront does not require any technical skill and Amazon provides many attractive templates that allow you to quickly design a multi-page store within a matter of minutes.
How To Make Your Amazon Storefront Step By Step
Here are the steps to easily make your own Amazon Storefront:
- Choose Your Template
- Enter In Your Store Settings
- Design Your Amazon Storefront
- Add Your Products
- Submit Your Page For Review
- Get A Vanity URL For Your Brand Page
Step 1: Choose Your Template
After you click on Stores–>Manage Stores, you’ll be directed to the Amazon page builder which you’ll be asked to choose a page template.
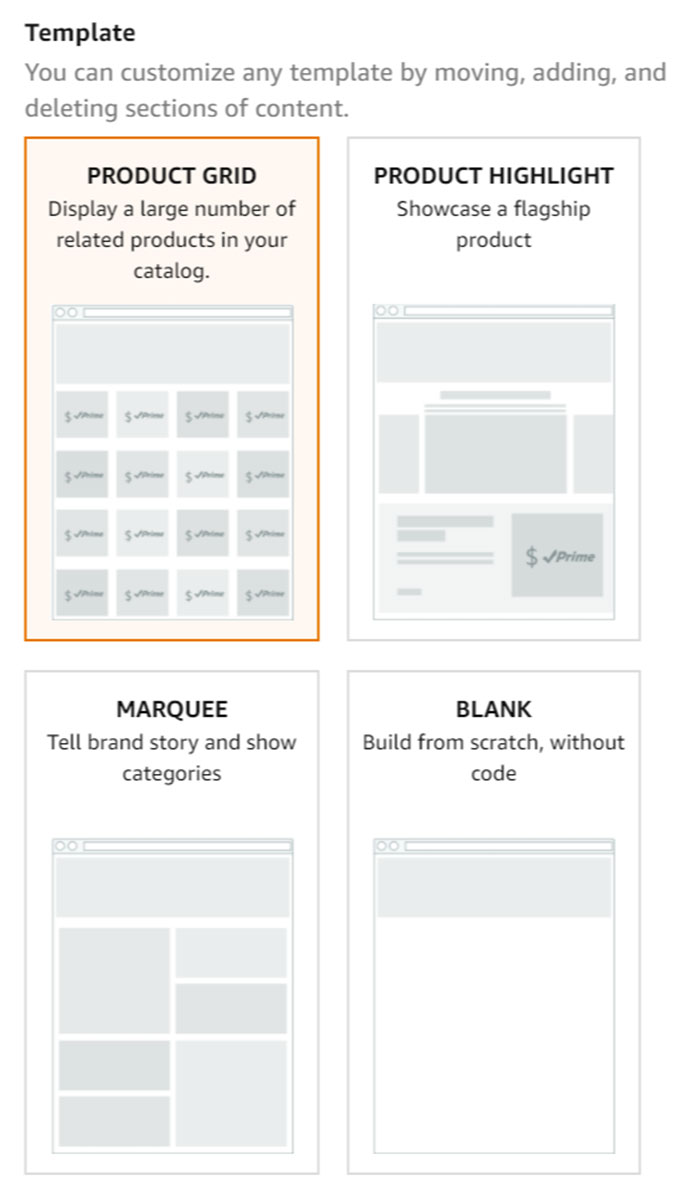
Pick an Amazon Storefront template that you like the most. I personally prefer the Marquee template but keep in mind that you do not have to use the templates that Amazon provides.
In fact, you can literally create your own design template from complete scratch.
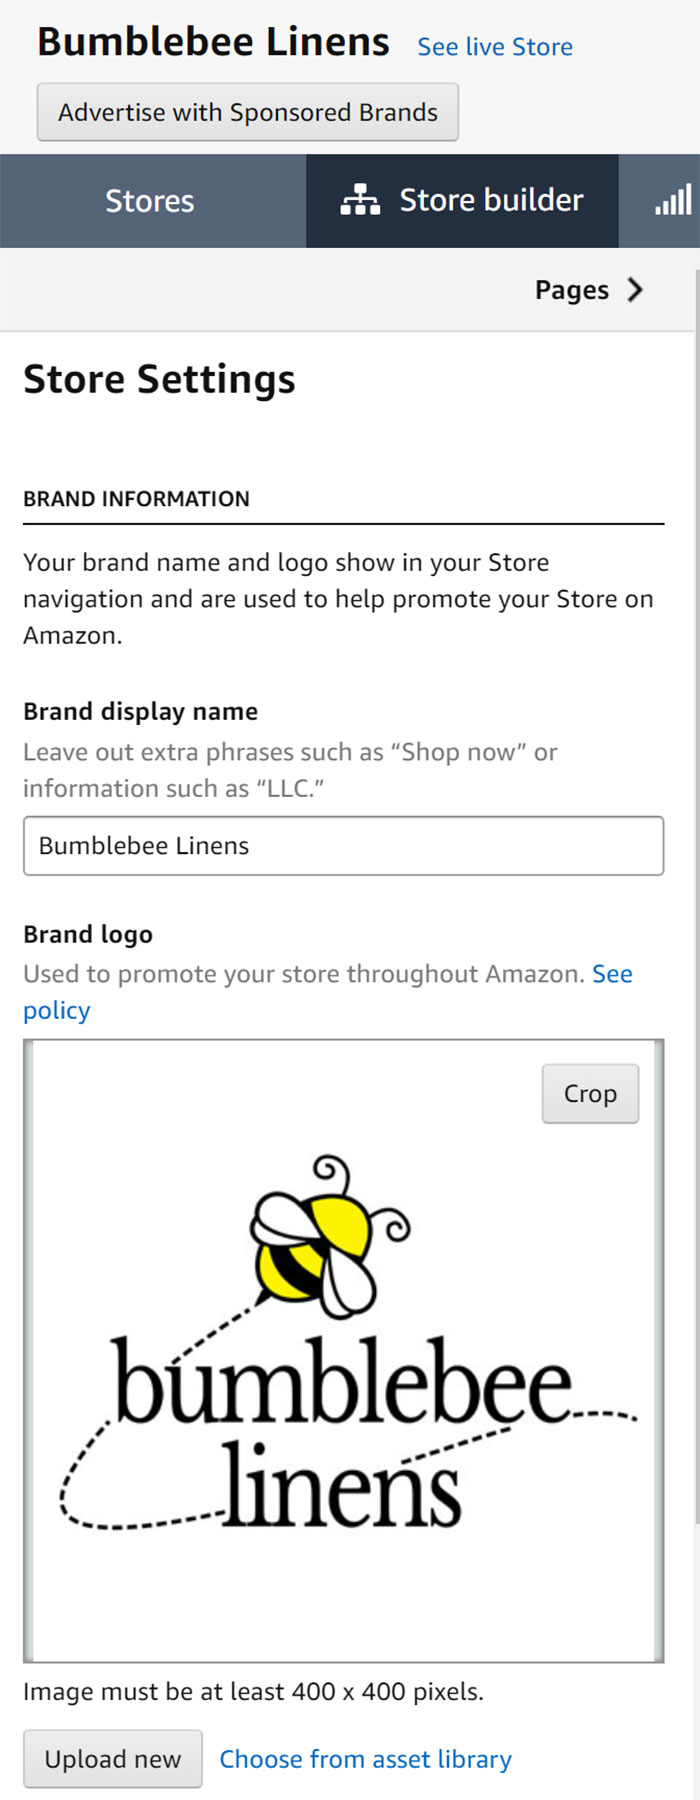
Step 2: Enter In Your Store Settings
Once you choose your template, you’ll be directed to the page builder where you can design your storefront.
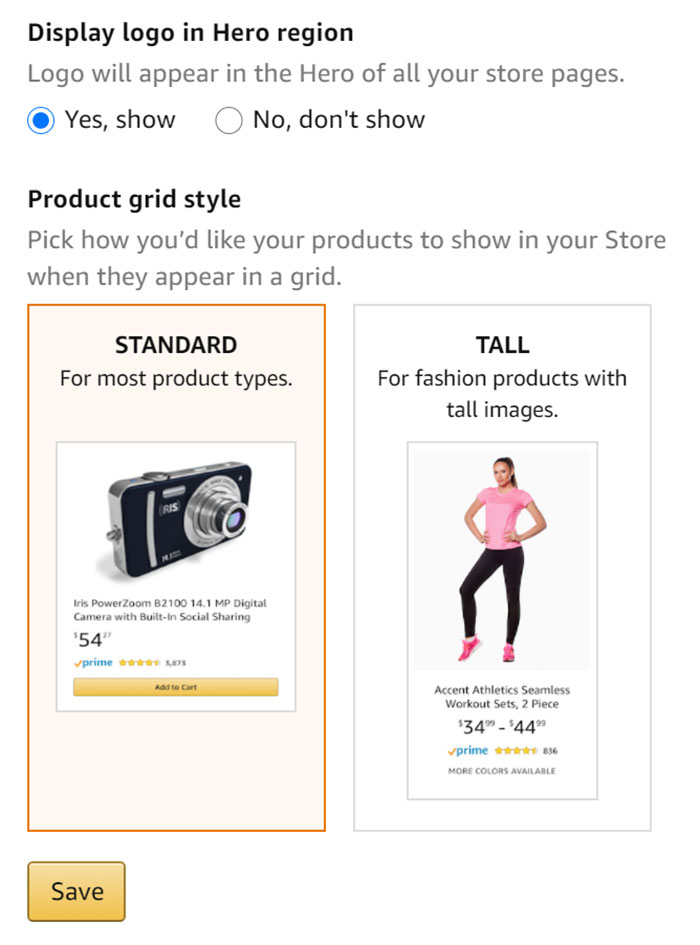
The first step of the Amazon page builder is to enter in your store settings and logo.
Then choose your product grid style.
Step 3: Design Your Amazon Storefront
Designing your actual Amazon Storefront is pretty straightforward, as Amazon’s design GUI is intuitive and easy to use.
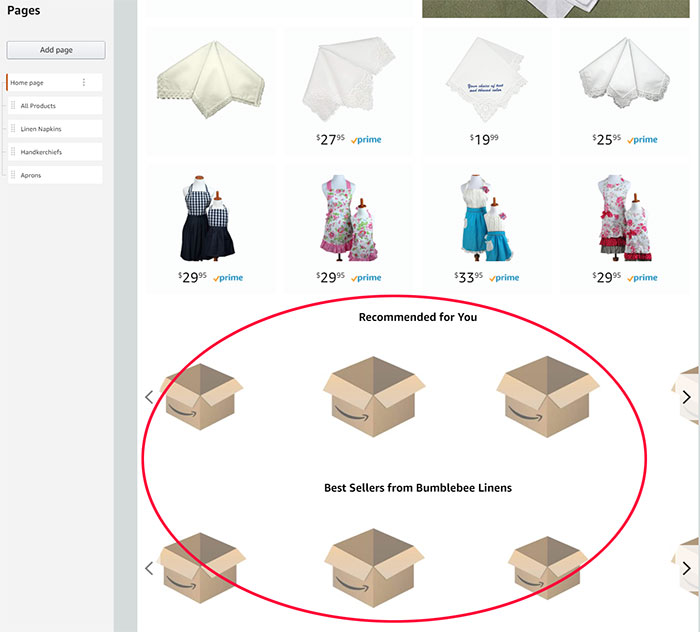
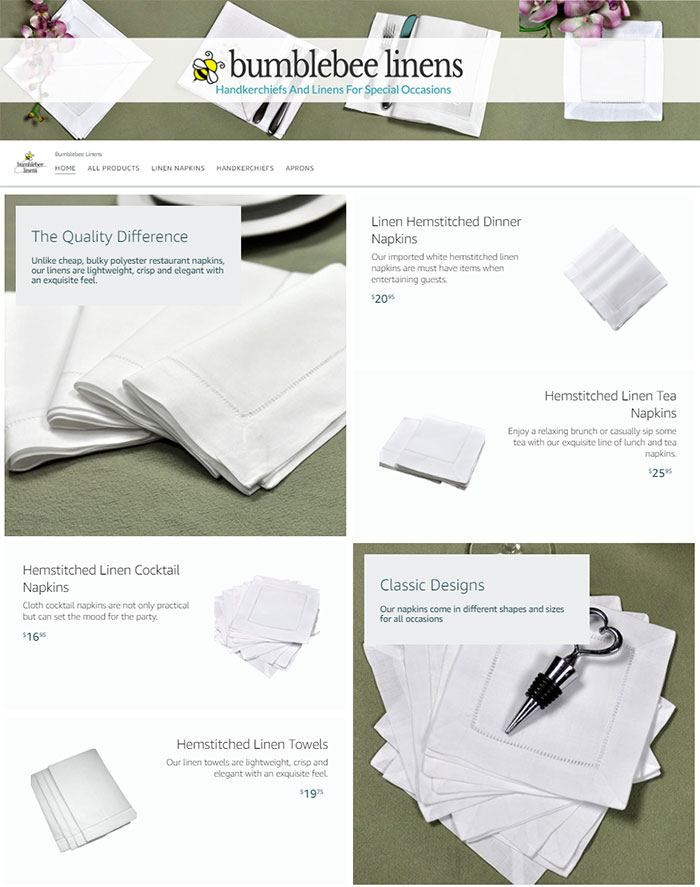
For your home page, you’ll want to outline your main unique value propositions above the fold and display your bestselling products.

At the bottom of my home page, I included bestsellers and recommended products which are automatically populated by Amazon
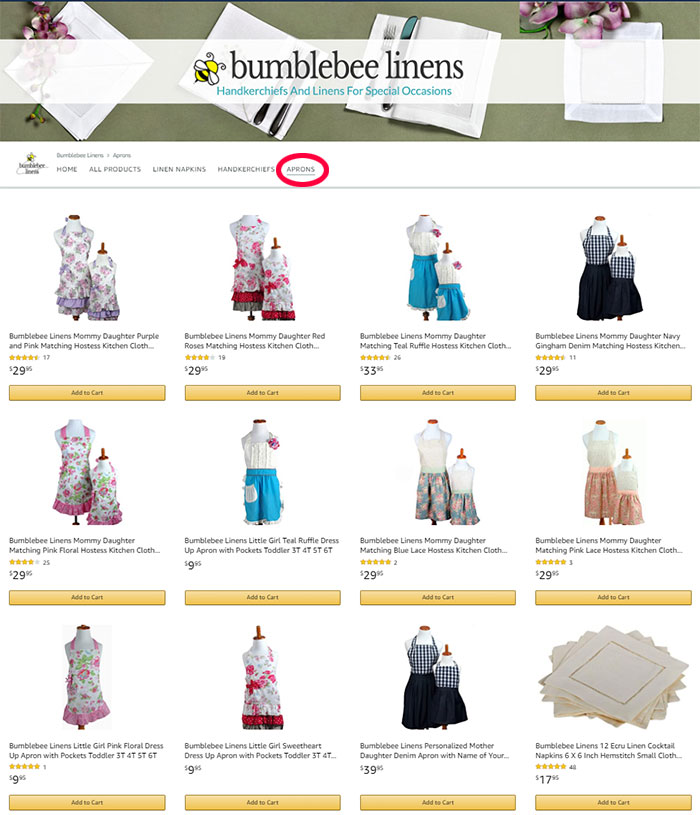
After you finish your homepage, create different category pages based on what you sell in your store.
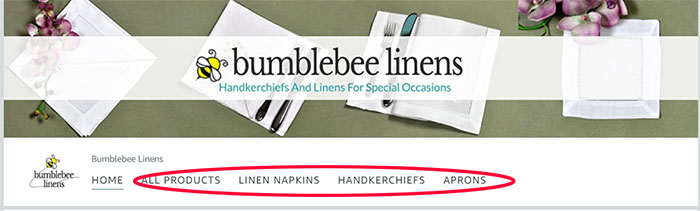
For example, I created separate pages for the following
- All Products
- Linen Napkins
- Handkerchiefs
- Aprons
Step 4: Add Your Products
After you’ve decided on your layout, the next step is to populate your store with products that you sell.
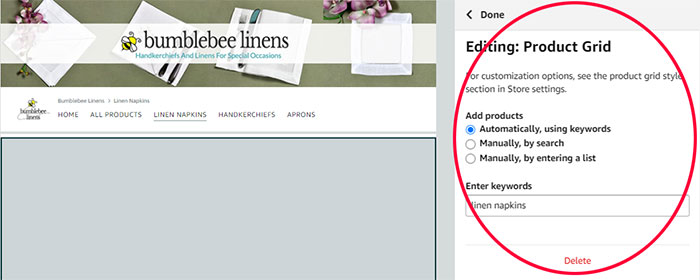
Amazon provides 3 ways to populate your store with products.
- Have Amazon automatically populate your products based on keywords
- Populate your products manually by search
- Populate your products manually by cutting and pasting ASINS
To minimize page maintenance, I have Amazon automatically populate my products based on keyword. This way, whenever I add a new Amazon product, it automatically gets added to my Amazon Storefront.
Step 5: Submit Your Page For Review
Amazon is quite strict when it comes to approving your Amazon Storefront pages for publication.
Double check your Storefront to avoid the following mistakes.
- Spelling mistakes
- Grammatical errors
- Use of overly promotional language(ex. best or number 1)
Surprisingly, it took me several tries to get my page approved because Amazon kept rejecting me for the language I used on the page.
For example, Amazon did not like it when I wrote that Bumblebee Linens carried the “largest selection of handkerchiefs” online.
In any case, page approval usually takes a few business days.
Step 6: Get A Vanity URL For Your Amazon Storefront Page
Amazon does not automatically assign you a vanity URL for your newly created Amazon store page. However you can get a vanity URL for your Amazon Storefront in 6 steps:
- Access your Seller Central account.
- From the main navigation, click on the “Stores” tab.
- Click on the “Settings” tab.
- Under “Store URL”, click on the “Change” button.
- Input your preferred Amazon Storefront URL.
- Click the “Save” button.
Make sure your Amazon Storefront’s vanity URL follows Amazon’s URL guidelines.
- Be related to the brand.
- Not include any special characters.
- Not infringe on any trademarks or copyrights.
- Be in compliance with all of Amazon’s policies.
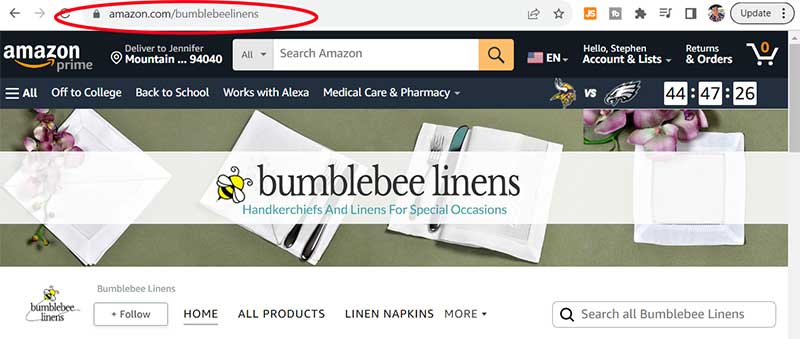
Here’s what my Amazon Storefront URL looked like before specifying a vanity URL.
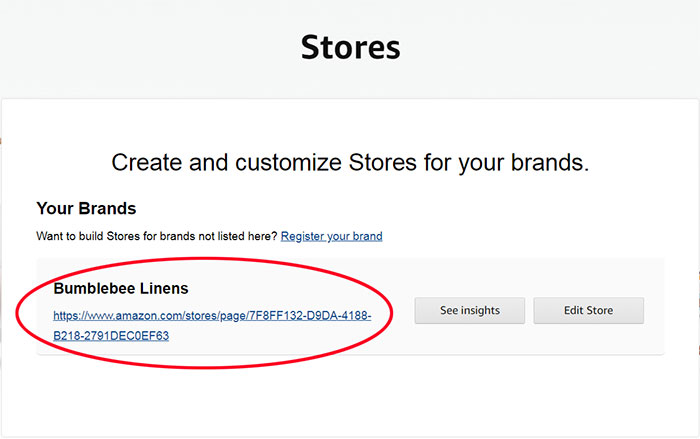
Here’s what my storefront looks like with the vanity URL.
Requirements For Setting Up An Amazon Storefront
Here is the list of requirements to setup an Amazon Storefront.
- Have a valid registered trademark for your brand that’s also displayed on your product packaging.
- Be able to verify your ownership of the trademark.
- Enroll in Amazon Brand Registry.
- Have an active professional seller or vendor account.
The most important requirement for setting up an Amazon Storefront is that you must be enrolled in the Amazon Brand Registry program.
The Amazon Brand Registry program helps you protect your brand and products from dirty sellers on Amazon and it requires a registered text or image-based trademark.
Brand registry also gives you access to many other Amazon features including A+ content and a special dashboard where you can search for and file copyright and trademark infringement claims.
Outside of the Amazon Brand Registry requirement, there is no minimum number of products required to create an Amazon store. You don’t have to pay for advertising either.
Basically, once you are enrolled in brand registry, Amazon Storefronts are available to all 3rd party sellers, 1st party sellers and Amazon agencies.
How Much Does It Cost To Create An Amazon Storefront?
Creating an Amazon Store is free for brands registered with Amazon Brand Registry.
However, sellers must have a professional selling plan, which costs $39.99/month in the U.S., plus additional selling fees based on the product category.
What Are The Benefits Of An Amazon Storefront
There are many benefits to making an Amazon Storefront.
- Enhanced brand visibility.
- Customized, branded shopping experience.
- Access to unique analytics for customer insights.
- Increased trust among shoppers.
- Promotion of a range of products in one curated space.
An Amazon Storefront is essential if you don’t have a website and need a convenient place to showcase your Amazon products.
Your Amazon store can serve as a destination for buyers to learn more about your brand and the specific value it provides.
What’s nice about Amazon stores is that you can easily build great looking web pages on Amazon that showcase your products with photos, text and video.
You can also dynamically populate your Amazon store pages with your products based on keyword parameters that you specify.
For example, the apron tab of my Amazon store automatically displays all of my products with the word “apron” in the title.
Overall, Amazon Stores let you create multiple pages with up to 3 levels of hierarchy. Everything is self-service and you can use its built in social sharing features to drive awareness and traffic.
Amazon Storefront Examples
Here’s the Amazon Storefront I created for my own brand, Bumblebee Linens.
Do You Need An Amazon Storefront If You Already Have An Online Store?
An Amazon Storefront is crucial if you want to use Amazon DSP ads. These ads retarget Amazon visitors, directing them back to your Amazon listings.
Amazon DSP ads allow you to drive traffic to your Amazon listings from an external website while leveraging Amazon customer data.
For example, if someone visits my Amazon listing but doesn’t buy, I can run an Amazon DSP ad to bring that customer back to my listing even if they are browsing a non-Amazon website.
In any case, people who initially find you through Amazon will want to complete their purchase on Amazon. As a result, it doesn’t make sense to drive Amazon retargeted traffic back to your own website.
Instead, you should direct existing Amazon customers to your Amazon storefront because that’s where they want to shop!
In a nutshell, even if you own your own website, you should always direct Amazon shoppers to your Amazon storefront page and everyone else to your own online store.
How to Promote Your Amazon Storefront
Here’s how you can promote your Amazon Storefront.
- Use a unique tagged source link to promote your Amazon storefront across social media. This includes Twitter, Facebook, Instagram, Pinterest etc…
- Link to your Amazon store from your product listing detail pages to show your customers what else you carry and what your brand is all about.
- Run Amazon Headline ads to promote your brand to Amazon shoppers.
- Drive retargeted traffic to your Amazon storefront by using Amazon DSP ads
- Use tagged source links to promote your Amazon store through email marketing, Messenger and SMS.
- Use the Amazon store reporting tools to measure the performance of your marketing efforts.
Having an Amazon storefront can greatly improve the conversion rate of your advertising efforts, specifically Amazon Headline ads and Amazon DSP.
How Can I Check My Amazon Storefront’s Analytics?
You can check your Amazon Storefront’s analytics using the following steps.
- Log into Seller Central.
- Navigate to the “Stores” menu.
- Click on “Manage Stores.”
- Select “View Insights” for detailed performance metrics of your Storefront.
Amazon gives you access to many analytics reports that are useful for seeing how well your page is performing.
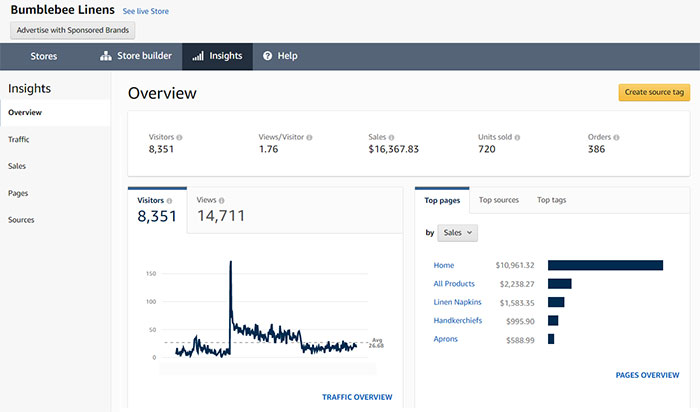
Here’s a summary of what metrics your Amazon Storefront analytics will tell you about.
- Visitors – This is the total number of unique visitors who visited your store pages.
- Views – This is the number of views that a page received.
- Top Pages – Amazon will display the top pages on your storefront and how much money they generated.
- Sales – This is the total sales that your products generated from visitors who visited your page.
- Units Sold – This is the total units sold that your store generated.
- Traffic Sources – Amazon’s page traffic report isn’t very granular but it will tell you where your sales are coming from based on 3 categories: Amazon organic traffic, Amazon Sponsored Brands or “other” sources.
- Tagged Sources – You can create custom source tags if you are driving your own external traffic to Amazon so you can measure the effectiveness of that traffic.
How To Create Tagged Source Links For An Amazon Storefront
You can create tagged source links for your Amazon Storefront using the following steps:
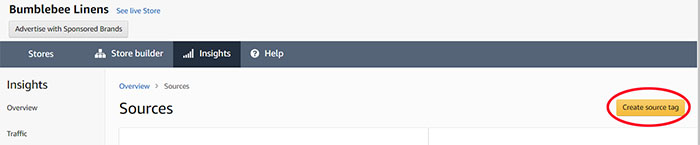
- Access Amazon’s Campaign Manager.
- Create a new source tag.
- Attach the tag to your desired Storefront URL.
- Use this tagged URL in promotions to track traffic sources.
Because I drive the majority of my traffic to my own online store, I rarely look at my Amazon Store analytics. However, for all external traffic that I drive to my Amazon storefront, I make sure to track sales by using tagged source links.
Amazon source tags allow you to create special links that you can use to track marketing promotions in your Amazon store analytics page.
For example, let’s say that you want to drive traffic from your Facebook page to your Amazon storefront. You would first click on “Create source tag”.
Then, you would give a name to this tagged link. In this example, I named the link “Facebook Home Page”.
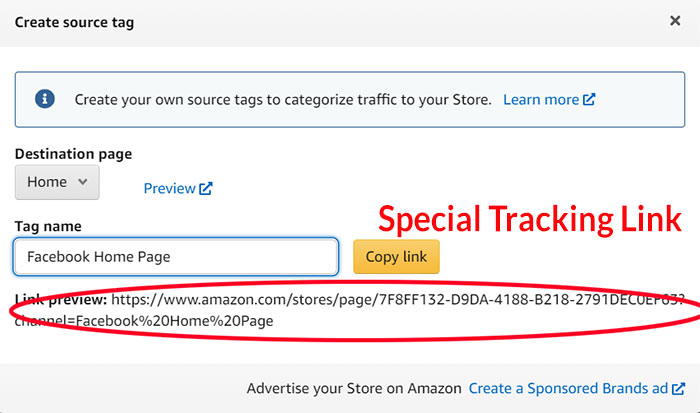
Finally, you would use this special link to advertise your Amazon storefront on Facebook.
If you don’t have a home base for your ecommerce business, an Amazon store is a quick and easy way to establish a presence online.
Now that you know how to make an Amazon storefront, you should set one up today. Doing so is quick, easy, and free!

Ready To Get Serious About Starting An Online Business?
If you are really considering starting your own online business, then you have to check out my free mini course on How To Create A Niche Online Store In 5 Easy Steps.
In this 6 day mini course, I reveal the steps that my wife and I took to earn 100 thousand dollars in the span of just a year. Best of all, it's free and you'll receive weekly ecommerce tips and strategies!
Related Posts In Amazon Sales Strategies
- How To Make An Amazon Storefront
- How To Use Amazon Posts To Grow Your Sales
- Amazon Liquidation – How To Get Rid Of Inventory That’s Not Selling
- What Is Amazon Renewed And How The Program Works
- How To 2X Amazon Sales By Using Viral Launch, Scope And Long Tail Pro To Target New Markets

Steve Chou is a highly recognized influencer in the ecommerce space and has taught thousands of students how to effectively sell physical products online over at ProfitableOnlineStore.com.
His blog, MyWifeQuitHerJob.com, has been featured in Forbes, Inc, The New York Times, Entrepreneur and MSNBC.
He's also a contributing author for BigCommerce, Klaviyo, ManyChat, Printful, Privy, CXL, Ecommerce Fuel, GlockApps, Privy, Social Media Examiner, Web Designer Depot, Sumo and other leading business publications.
In addition, he runs a popular ecommerce podcast, My Wife Quit Her Job, which is a top 25 marketing show on all of Apple Podcasts.
To stay up to date with all of the latest ecommerce trends, Steve runs a 7 figure ecommerce store, BumblebeeLinens.com, with his wife and puts on an annual ecommerce conference called The Sellers Summit.
Steve carries both a bachelors and a masters degree in electrical engineering from Stanford University. Despite majoring in electrical engineering, he spent a good portion of his graduate education studying entrepreneurship and the mechanics of running small businesses.